From personal experience we know how important a good witness can be if you are involved in a traffic accident. Dashboard cameras are growing in popularity as quickly as their prices are coming down. Aya dove into the research and we bought one on our last trip to Japan.

We settled on a Driveman 720s. Interesting that the name "Walkman" still carries so much influence. The "s" means that it goes into "security" mode when the car is parked, keeping a 1-photo-per-second eye on things.
Installing electronics into cars is an area in which we claim complete ignorance. Before we paid someone to do it for us, however, we tried looking to a semi-reliable resource for help: Ye Olde Internette.
Here is a sample answer we got from Matrix Owners' Forum:
We understand the words, but we don't know how to do that.
Someone on Reddit, however, came through like a champ with clear, useful advice and encouragement to give it at try ourselves. We even found a Youtube video of someone walking through the first half of the job.
 A little leverage got the dashboard opened up. No scratches from the tape-covered pry tool.
 The first panel came off very simply. The two cables for the hazard light and the security system light detached very easily.
 Four bolts held the radio in place. We needed the extensions in our ratchet set to reach the ones on the right, which were set quite far back.
 Radio out.
 Some rather intimidating bundles of wires behind the radio. Getting them un-clipped was tricky enough. Like most arcane bits of knowledge, someone has made lists and put them on-line for all to see. This forum page has the wiring diagram for the 2009 Corolla (same as the Matrix). Imagine that.
Battery Light Blue (+) Radio Harness
Accessory Gray (+) Radio Harness
Interestingly, there were small taps already attached to the Light Blue and Grey wires (the red blobs in the pic above).
 Not sure if those came from the factory or if someone installed a device that was removed later. We pried them off because the camera wires had their own taps included.
 The taps and ground clip that came with the camera.
 Light Blue has a 12v charge that is always on and the Grey is controlled by the ignition switch.
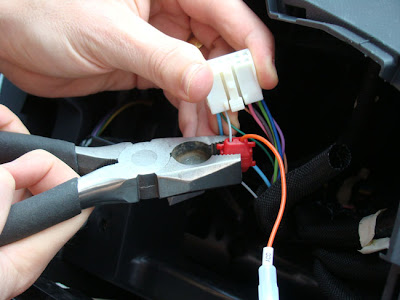 Orange ACC tap on the Gray Accessory wire.
 Red Battery (+) tap on the Light Blue Battery wire.
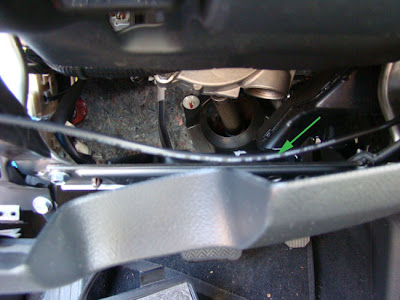
 The Ground wire attached easily to a handy grounding point we found behind the stereo.
 The camera came on with the first ignition start.
We tried placing the camera in all kinds of positions on and around the dash, looking for the best spot. It is intended to be suspended from the ceiling, and we found a place behind the rear view mirror that was unobtrusive and had the best view. That meant running the wire across the ceiling and down into the dashboard.
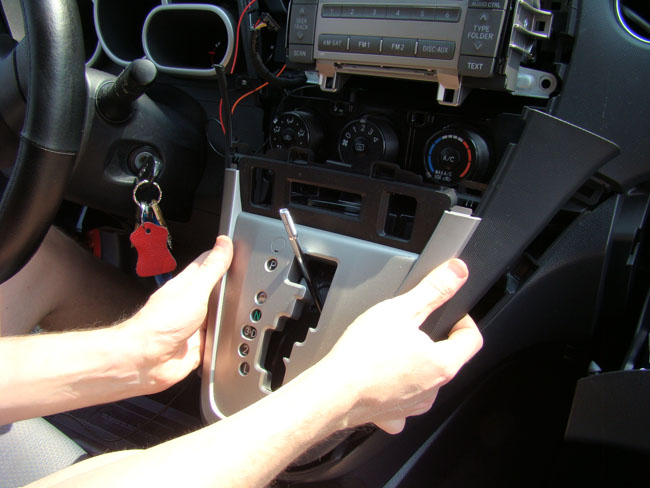
 To feed the wire behind the panels, we had to remove the the shift handle and get behind the shifter panel.
 The shifter panel lifted off easily. The panel under the steering wheel had two screws holding it in place.
We were amazed at how the panels were clearly designed to snap on and off with very little effort.
 Aya's hands dug deep into the dash to catch the camera wire dangling down from behind the stereo. This out-of-focus shot shows the wire running behind the panel under the steering wheel.
 We found a good exit point for the wire at the lower left edge of the dash panel and snapped the panels back in place. They fit as tightly as if they had never been disturbed, with no broken or stressed tabs. Thank you, Toyota panel designers.
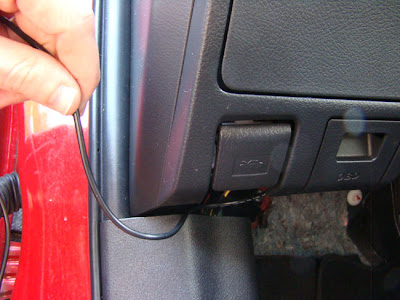
 We were happy to discover that we could just push the wire between the soft molding around the door frame and the dash panel, keeping the wire secure and completely out of sight.
 This continued up behind the rubber seal along the door frame and around the window. Sorry about the weird focus on this photo.
 We continued hiding the wire, pushing it in between the soft ceiling cover and the hard window frame panel.
 Continuing along the window frame, we pushed the wire up under the edge of the ceiling cover, completely hiding it from view.
 With just a few centimeters of wire protruding at the end, we cleaned off the glass with rubbing alcohol before peeling back the cover of the sticky pad and affixing the camera to the windshield.
 Here's the passenger's point of view with the camera installed and turned on.
 And here's what the driver sees. It barely protrudes from behind the mirror and doesn't obstruct the view out the windshield. We had thought we were going to have the wire flopping all over the dash, or were going to have to drill a hole somewhere, so we were very happy to be able to tuck the wire invisibly all around the panels and frame seals.
Now that it is installed and working, we really hope we never need it.
We settled on a Driveman 720s. Interesting that the name "Walkman" still carries so much influence. The "s" means that it goes into "security" mode when the car is parked, keeping a 1-photo-per-second eye on things.
Installing electronics into cars is an area in which we claim complete ignorance. Before we paid someone to do it for us, however, we tried looking to a semi-reliable resource for help: Ye Olde Internette.
Here is a sample answer we got from Matrix Owners' Forum:
If I were you I would just run a line from the battery directly for your
battery (+), and for the ACC (+) there is a product called add a fuse,
pick one up that will fit your fuse box under the steering wheel and
pick a fuse that is only on with ACC such as your cigarette lighter,
radio, ect.
We understand the words, but we don't know how to do that.
Someone on Reddit, however, came through like a champ with clear, useful advice and encouragement to give it at try ourselves. We even found a Youtube video of someone walking through the first half of the job.


Battery Light Blue (+) Radio Harness
Accessory Gray (+) Radio Harness
Interestingly, there were small taps already attached to the Light Blue and Grey wires (the red blobs in the pic above).


We tried placing the camera in all kinds of positions on and around the dash, looking for the best spot. It is intended to be suspended from the ceiling, and we found a place behind the rear view mirror that was unobtrusive and had the best view. That meant running the wire across the ceiling and down into the dashboard.

We were amazed at how the panels were clearly designed to snap on and off with very little effort.


Now that it is installed and working, we really hope we never need it.
Amazing job, you two! Very impressive, indeed.
ReplyDeleteAnother option during the tap and clip procedure, of course, is to employ the very versatile reverse thread henway. Facilitated by an industrial grade piecost. FYI.
- Anonrob
We could have used that henway later when we had to go back in and reconnect the forgotten antenna wire! Ended up with a kukking after all.
ReplyDeleteThis "kukking" you mentioned. Don't think I've heard of it... Mmm. Kukking. Kukking. Nope, haven't heard of it. Huh. Interesting. Wow. Kukking. I wonder what that is...
ReplyDelete